In a FedRAMP compliant ServiceNow environment, storing usernames and passwords for MID Servers is not allowed even if encrypted. To meet these strict security requirements, the recommended approach is to use mutual TLS (mTLS) between the MID Server and ServiceNow.
The mTLS ensures that:
- The MID Server authenticates itself with a client certificate.
- ServiceNow validates that certificate against a trusted Certificate Authority (CA).
- ServiceNow then maps the certificate to a specific user account, enabling secure, passwordless authentication.
This guide walks through the end-to-end setup of a MID Server with mTLS in a FedRAMP ServiceNow instance.
1. ServiceNow instance configuration
Before configuring the MID Server host, the ServiceNow platform must be prepared to accept certificate-based authentication.
Enable mTLS on the backend
ServiceNow Support must enable mTLS for your DEV, TEST and PROD instances. This is usually scheduled during a change window (e.g., over the weekend).
Enable certificate-based authentication
Activate the following property:
glide.authenticate.cert.enabled = trueThis allows the platform to use certificates for login.
Confirm authentication plugin
Verify that the plugin Certificate-based Authentication (com.glide.auth.mutual) is active.
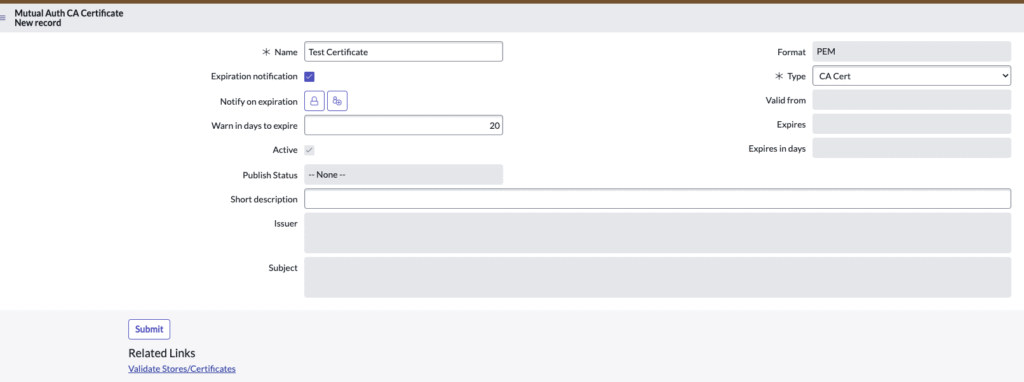
Upload certificates
(In this case we used Sectigo Certificates)
- Navigate to System Security → Certificates → Certificate-Based Authentication → CA Certificate Chain.
- Upload the Intermediate–Root Certificate PEM bundle provided by Sectigo.
- ServiceNow will populate certificate details automatically.
- Use the Validate stores/certificate option and wait until the Publish Status is set to Active.
Map client certificate to user
- Go to Users to Certificate Mapping.
- Upload the client certificate for the MID Server.
- Link it to the MID Server user account you havecreated (with the
mid_serverrole).

At this stage, ServiceNow knows which CAs to trust and which certificate belongs to your MID Server user.
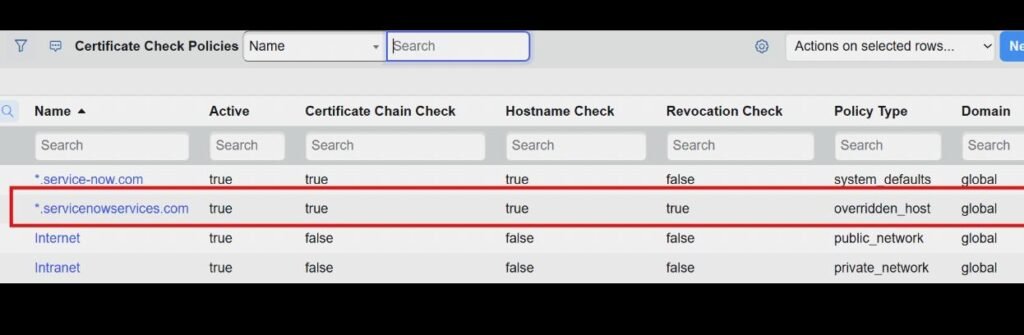
Add servicenowservices.com to the Certificate Check Policies
- Go to Certificate check policies table (
mid_cert_check_policy) - Add
*.servicenowservices.comrecord with valuestruefor Certificate Chain Check, Hostname Check & Revocation Check
2. MID Server installation & configuration
Next, configure the MID Server host to connect via mTLS.
Install the MID Server application
Download the MID Server package from your instance and install it on the designated host server. In this case we downloaded the windows Zip file package.
Edit config.xml
Locate the configuration file in the MID Server installation directory and update the following:
- Instance URL → your ServiceNow instance
- MID Server Name → must match the one in ServiceNow
- Update properties:
mid.proxy.use_proxy = falsemid.upgrade.use_proxy = falsemid.ssl.bootstrap.default.check_cert_revocation = true
Save the changes and this ensures the MID Server connects directly to ServiceNow, checks revocation lists, and avoids proxy interference.
3. Enabling mTLS on the MID Server
Once installed and configured, enable certificate authentication on the MID Server:
Enable mTLS mode
From the bin\scripts directory in the MID Server installation folder, run:
manage-certificates -mAdd the client certificate to the keystore
manage-certificates -a defaultsecuritykeypairhandle <Client Cert File Location>(use only ‘defaultsecuritykeypairhandle’ as alias name when adding the certificate. Adding other alias name will cause errors)
Verify the certificate presence
manage-certificates -lConfirm that the client certificate is listed in the keystore.
Enable FIPS mode
Run:
set-fips-enforced-mode.bat onIf successful, you’ll see a return code of 0. This step ensures only FIPS-approved cryptography is used, which is mandatory for FedRAMP.
What is FIPS Mode?
FIPS stands for Federal Information Processing Standards.
These are U.S. government standards that define how sensitive data must be protected. In particular, FIPS 140-2 and FIPS 140-3 set strict rules for how cryptographic modules (encryption, hashing, key management) must operate.
When a system is running in FIPS mode, it is locked down to use only approved, government-validated cryptographic algorithms such as:
- AES (Advanced Encryption Standard)
- SHA-256 (Secure Hash Algorithm)
- RSA with strong key lengths (2048-bit or greater)
At the same time, weaker or outdated algorithms (like MD5, DES, or RC4) are blocked.
Start the MID Server service
Restart the MID Server service.
Validate the connection
In ServiceNow:
- Navigate to MID Servers → All MID Servers.
- Verify that the MID Server status is Up.
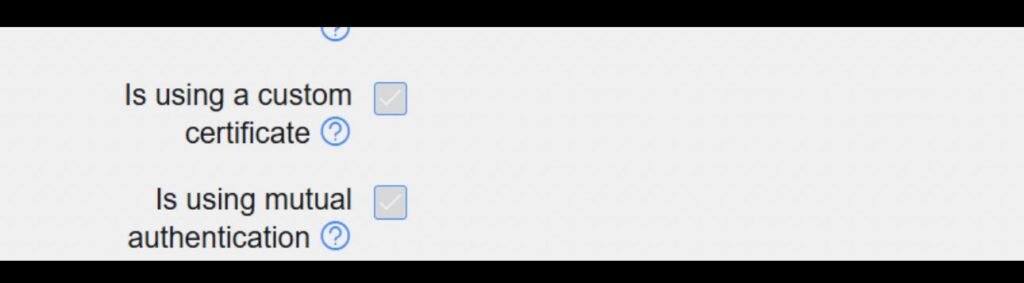
- Verify the following
- Is using a custom certificate checkbox – True
- Is using mutual authentication – True
4. Additional implementation notes
- If the connection is initially successful but later drops, check that the keystore still contains the client certificate using:
manage-certificates -l - Always use the Intermediate–Root PEM bundle to establish trust.
- Ensure the following URLs are allowed through the firewall for ServiceNow and certificate revocation checks (normally the fedRAMP instances have denyAll PermitByException) :
service-now.comcrl.comodoca.comcrl.usertrust.comocsp.comodoca.comocsp.usertrust.com
- If the certificate is provided as a PFX, convert it to PEM using OpenSSL:
- # Extract Private Key
openssl pkcs12 -in client.pfx -nocerts -out client_key.pemcat priv-key.pem
- # Extract Client Certificate
openssl pkcs12 -in client.pfx -clcerts -nokeys -out client_cert.pemcat certificate.pem
- # Extract Private Key
- Join these two files in a text file then convert to PEM prior to uploading to the Keystore
With this setup:
- The MID Server does not store or use usernames and passwords.
- Authentication is handled securely through mTLS certificates.
- ServiceNow trusts the MID Server only if:
- The certificate is issued by a trusted CA,
- The certificate maps to the correct MID Server user, and
- The connection uses FIPS-compliant encryption.
This makes the integration not only FedRAMP compliant but also future-proof by following modern zero-trust security patterns.